

Grout Solutions
Grout Gone Bad? 10 Ways to Fix Grout Stains, Cracks, and Discoloration
Aug
Your tile can still look great while the grout makes the entire floor, shower, backsplash, or entryway feel old.
Dark stains, yellowing, uneven color, cracks, missing sections, and worn grout lines tend to stand out because grout creates the visual grid around every tile. Once those joints start looking dirty or damaged, the entire installation can seem neglected.
The frustrating part is that regular mopping usually does very little to fix the problem.
That is because grout problems do not all have the same cause.
Some grout only needs a proper deep cleaning. Other joints have permanent staining that cleaning cannot remove. Cracked or loose grout needs repair, while structurally sound grout with inconsistent color may be a good candidate for grout color sealing.
Learning how to fix grout stains and cracks starts with identifying which problem you actually have.
At This Old Grout, we have spent more than three decades helping homeowners and restoration professionals improve tile and grout with contractor-grade cleaners, sealers, and grout color restoration products.
Here are 10 practical steps for deciding what your grout needs and how to bring the installation back to life.
1. Figure Out Why the Grout Looks Dirty
“Dirty grout” can mean several different things.
Grout lines collect contaminants because they sit between the tile and often slightly below the tile surface.
Depending on the room, grout may absorb or hold:
- Dirt
- Grease
- Cooking oils
- Soap residue
- Body oils
- Hard-water minerals
- Cleaning-product residue
- Cosmetic products
- Organic staining
- Everyday spills
Traditional cement-based grout is porous, which means discoloration may extend below the surface.
That is why a quick mop may make the tile shine while the grout still looks dark.
Location Gives You Clues
Where the discoloration appears can help identify the source.
Kitchen grout may contain:
- Grease
- Food spills
- Tracked-in soil
Bathroom and shower grout may collect:
- Soap scum
- Body oils
- Hard-water minerals
- Shampoo or cosmetic residue
- Moisture-related discoloration
Entryway grout commonly picks up:
- Dirt
- Mud
- Oils
- Outdoor contaminants
Understanding the soil helps you choose a cleaner that actually addresses it.
2. Determine Whether the Grout Is Dirty or Permanently Stained
Before reaching for stronger chemistry, clean a small test area.
If the grout becomes lighter and stays even after drying, the problem may primarily be surface contamination.
If it looks clean while wet but becomes blotchy again after drying, discoloration may have penetrated deeper into the grout.
That distinction matters.
Repeated aggressive cleaning may not restore grout that has absorbed years of:
- Oils
- Pigments
- Mineral staining
- Previous chemicals
- Other contaminants
At some point, the goal should change from “keep scrubbing” to “restore the finished color.”
That is where grout color sealing becomes useful.
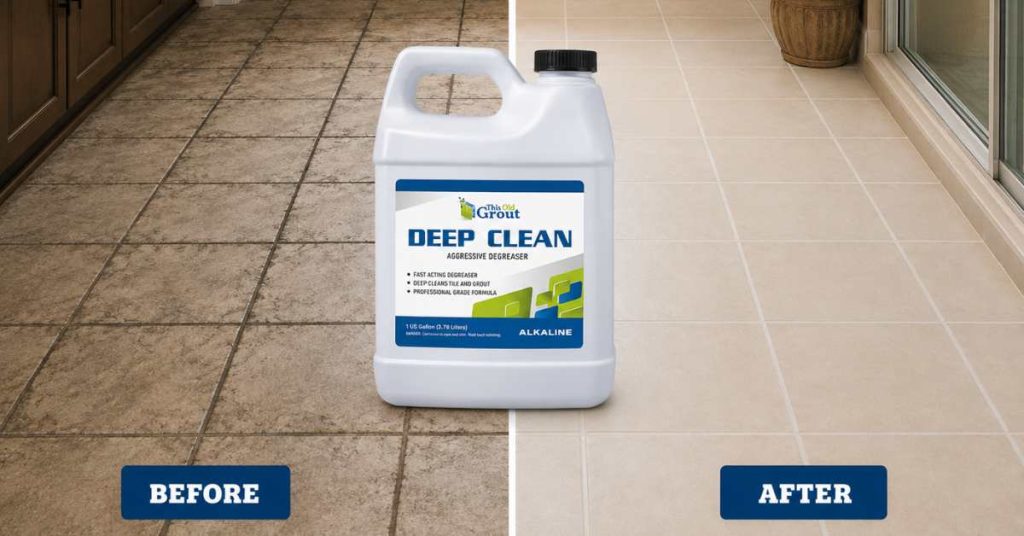
3. Deep-Clean Grout Before Considering Restoration
Cleaning should usually come before repair or sealing.
Start by removing loose dirt from the tile surface.
Then select a cleaner appropriate for both the tile and the type of contamination.
A professional cleaning process may include:
- Removing loose debris
- Applying the proper cleaner
- Allowing appropriate dwell time
- Agitating the grout
- Rinsing thoroughly
- Removing the dirty solution
- Allowing the grout to dry
Give the Cleaner Time to Work
One of the most common mistakes homeowners make is spraying a cleaner and immediately scrubbing harder.
Chemistry needs contact time.
Follow the product directions and allow the solution to work without letting it dry on the surface.
Use an Appropriate Grout Brush
A nylon grout brush can help reach the recessed joint.
Avoid overly aggressive brushes or abrasive tools that may roughen the grout surface or damage nearby tile.
Rinse Thoroughly
Cleaner residue left behind may create haze or attract more dirt.
A proper rinse is just as important as the cleaning itself.
4. Let Grout Dry Before Judging the Result
Wet grout can be misleading.
Water often darkens grout and makes color variations temporarily disappear.
The grout may look perfect immediately after cleaning, then dry several shades lighter or reveal blotchy areas that were hidden while wet.
Allow enough drying time before deciding whether the cleaning worked.
Once dry, check for:
- Uniform color
- Remaining stains
- Dark patches
- Light patches
- Repairs that do not match
- Previously hidden cracks
If the grout is clean but still uneven, more aggressive cleaning may not be the best next step.
5. Use Grout Color Sealing for Permanent Discoloration
Sometimes grout is clean but still does not look clean.
Years of staining, repairs, fading, previous cleaning, and natural color variation can create grout lines that are several different shades.
A grout color sealer can restore a more consistent appearance.
Color sealing combines:
- Color correction
- Surface protection
- Improved stain resistance
- Easier future maintenance
Instead of trying to force old grout back to its original shade, you apply a consistent finished color across properly prepared grout joints.
Match the Original or Change the Look
You can choose a shade similar to the original grout or update the appearance entirely.
For example:
- A lighter neutral can soften the tile pattern.
- A darker shade may help hide future soil.
- A contrasting color can make individual tiles stand out.
- A close match can make old repairs less noticeable.
Always test the color before committing to the entire floor or shower.
6. Inspect Cracked Grout Before Trying to Cover It
Cracks need a different approach from stains.
A color sealer or clear grout sealer cannot repair grout that is structurally failing.
Look closely at the damaged area.
Ask:
- Is it one small crack?
- Are several joints cracked?
- Is grout missing?
- Does the grout feel loose?
- Does it crumble when touched?
- Are nearby tiles loose?
- Does the crack return after previous repair?
A small isolated defect may be suitable for localized repair.
Widespread or recurring cracks may indicate movement or another installation problem.
Covering the symptom without understanding the cause can lead to the same crack returning.
7. Remove Loose Grout Before Repairing the Joint
Fresh grout needs a sound area to bond to.
If loose, powdery, or crumbling material remains in the joint, simply placing new grout over it may create another weak repair.
Localized restoration generally involves removing failed material carefully before installing replacement grout.
Take care not to damage the tile edges.
Once the damaged material is removed:
- Clean the joint
- Remove debris
- Follow the repair-product directions
- Allow the repair to cure properly
The goal is a repair that becomes part of the joint rather than a thin patch sitting over loose material.
8. Know When Grout Is Not the Right Material
Not every joint between tiled surfaces should contain rigid grout.
Areas where different planes meet may require a flexible sealant, depending on the installation.
Common examples include:
- Wall-to-floor transitions
- Shower corners
- Tub-to-tile joints
- Countertop-to-backsplash transitions
- Other movement joints
If rigid grout repeatedly cracks in the same transition, movement may be the reason.
Repeatedly filling that joint with more grout may only recreate the failure.
Flexible joint materials are designed to tolerate movement better than rigid grout.
When in doubt, evaluate why the joint is moving before repairing it.
9. Use Grout Sealer After the Grout Is Clean and Sound
Once grout has been properly cleaned or repaired, sealing can make future maintenance easier.
A suitable grout sealer helps slow the absorption of liquids and contaminants.
That gives homeowners more time to clean:
- Spills
- Dirt
- Oils
- Soap residue
before they penetrate deeply.
There are two common restoration approaches.
Clear Penetrating Grout Sealer
This helps protect absorbent grout while maintaining its existing appearance.
It makes sense when:
- Grout color already looks good
- Joints are uniform
- Protection is the main goal
Grout Color Sealer
A grout color sealer changes or restores the appearance while adding protection.
It makes sense when:
- Permanent stains remain
- Grout colors are uneven
- Repairs do not match
- Homeowners want a new grout color
- Easier maintenance is desired
The correct choice depends on the existing condition and desired finished appearance.
10. Build a Better Maintenance Routine
Restoration should make grout easier to maintain, not create a cycle where you need another major cleaning a few months later.
After the grout has been restored, use a cleaner suited to the tile and grout.
Routine maintenance is usually easier when you:
- Clean spills promptly
- Avoid leaving dirty water on the floor
- Use appropriate cleaners
- Avoid overly abrasive pads
- Rinse cleaning residue
- Maintain shower ventilation
- Repair leaks quickly
Avoid Constantly Using the Strongest Cleaner
More aggressive chemistry is not automatically better.
Repeated use of strong acids, high-pH cleaners, bleach, or abrasive products may affect:
- Grout
- Sealers
- Natural stone
- Tile finishes
- Metal fixtures
Use stronger products when the soil requires them, not simply because they seem more powerful.
Common Causes of Grout Stains
Understanding the source helps prevent the problem from returning.
Dirt and Soil
Foot traffic pushes fine dirt into porous grout lines.
Grease and Cooking Oil
Kitchen grout may absorb oils that ordinary mopping cannot remove.
Hard-Water Minerals
Bathrooms and showers commonly develop mineral residue from repeated water exposure.
Soap and Body Oils
Shower grout can become coated with a mixture of soaps, skin oils, and personal-care products.
Cleaning Residue
Using too much cleaning product or failing to rinse can leave sticky residue that attracts new soil.
Moisture
Persistent darkening may indicate that an area stays wet longer than it should.
That does not always mean there is an installation problem, but recurring moisture deserves attention.
Why Bleach Is Not the Answer to Every Grout Problem
Bleach is one of the first products many homeowners reach for when grout becomes dark.
It may lighten certain types of discoloration.
However, bleach does not remove every contaminant.
It is not particularly effective for:
- Mineral scale
- Grease
- Embedded oils
- Some permanent stains
Repeated use may also affect nearby surfaces or existing sealers.
Never mix bleach with:
- Acid cleaners
- Ammonia
- Other household chemicals
Dangerous fumes can result.
Choose chemistry based on the soil rather than assuming bleach is a universal grout restoration product.
Can You Fix Cracked Shower Grout?
Sometimes.
The correct solution depends on the location and cause.
A small damaged grout joint may be repairable.
However, shower cracks deserve closer inspection when you also see:
- Loose tile
- Failed caulk
- Persistent dampness
- Soft areas
- Repeated cracking
- Missing grout
- Water staining
These signs can indicate a problem beyond a simple cosmetic repair.
Sealing over the grout will not fix an underlying water-management issue.
Address the cause first.
Can Old Grout Be Restored Without Replacing the Tile?
Often, yes.
If the tile remains securely bonded and the grout is generally sound, restoration may dramatically improve the appearance without tearing out an otherwise usable installation.
A typical process may include:
- Deep cleaning
- Evaluating remaining stains
- Repairing isolated damaged joints
- Allowing repairs to cure
- Color sealing or clear sealing
- Establishing a maintenance routine
This approach can work well on:
- Kitchen floors
- Bathroom floors
- Showers
- Backsplashes
- Entryways
- Laundry rooms
- Other tiled surfaces
That can save homeowners from replacing tile they still like simply because the grout has aged badly.
When Grout Restoration Is Not Enough
Grout restoration has limits.
Some conditions need more extensive correction.
These may include:
- Loose tile
- Significant movement
- Extensive grout failure
- Active water intrusion
- Damaged backing materials
- Major substrate problems
A cosmetic treatment should never be used to hide a failing installation.
The best restoration preserves what is worth saving while recognizing when repair needs to go deeper.
Suggested Internal Links
Use 5–8 internal links naturally throughout the article, such as:
- Tile and grout cleaners
- Grout color sealer
- Grout sealer
- Color sealer color chart
- Shower grout restoration
- Tile and grout maintenance products
- Grout repair products
- This Old Grout restoration products
Place each link in the section where it naturally supports the topic.
Why Homeowners Choose This Old Grout
This Old Grout focuses on helping homeowners and professionals restore tile and grout rather than automatically replacing it.
Our product options include solutions for:
- Tile and grout cleaning
- Grout color restoration
- Grout sealing
- Ongoing maintenance
- Hard-surface care
With more than three decades of experience in tile and grout restoration, This Old Grout provides contractor-grade products designed around real surface-care problems.
The goal is simple:
Help you identify what is wrong, choose the appropriate restoration process, and make the existing tile look cared for again.
Frequently Asked Questions About Grout Stains and Cracks
Can badly stained grout be restored?
Yes. Deep cleaning may remove soil and surface contamination. If permanent discoloration remains, grout color sealing can create a more uniform appearance.
Can I put grout sealer over dirty grout?
No. Clean the grout thoroughly and allow it to dry according to the product instructions before sealing.
Does grout color sealer cover stains?
A quality color sealer can help create a consistent finished color after proper cleaning and preparation.
Does grout color sealing change the grout color?
It can. You may choose a shade close to the existing grout or select a different color to update the appearance.
Should cracked grout be sealed?
Repair the damaged joint and determine why it cracked before sealing. Sealer does not repair structural movement.
Why does grout turn dark?
Common causes include dirt, moisture, grease, body oils, soap residue, hard-water minerals, and cleaning-product buildup.
Why does my grout look clean when wet but dirty when dry?
Water temporarily darkens grout and can hide color differences. Permanent staining may become visible again as the grout dries.
Can I repair one small section of grout?
Often, yes. If damage is localized and the surrounding installation remains sound, the failed material may be removed and repaired.
Is grout restoration cheaper than replacing tile?
It can be a much more practical option when the tile remains securely bonded and in good condition. The actual cost depends on the size and condition of the installation.
Does grout need to be sealed?
Porous cement-based grout can often benefit from appropriate protection. Whether you choose a clear penetrating sealer or color sealer depends on the grout’s condition and appearance.
Final Thoughts
Learning how to fix grout stains and cracks begins with diagnosing the problem rather than immediately reaching for the strongest cleaner.
The 10 most important steps are:
- Identify what is discoloring the grout
- Determine whether the problem is dirt or permanent staining
- Deep-clean correctly
- Allow the grout to dry before evaluating it
- Use color sealing when clean grout remains uneven
- Inspect cracks before covering them
- Remove loose material before repair
- Use flexible joint materials where appropriate
- Protect clean, sound grout with the right sealer
- Maintain the restored surface correctly
Stained or cracked grout does not automatically mean the tile has reached the end of its life.
If the installation remains sound, deep cleaning, localized repair, and grout color sealing can often transform the entire surface without a tear-out.
This Old Grout provides contractor-grade tile and grout restoration products designed to help homeowners bring older installations back to a cleaner, more consistent appearance.
When the tile is still worth keeping, restoring the grout may be the step that makes the whole room feel new again.
