

Grout Solutions
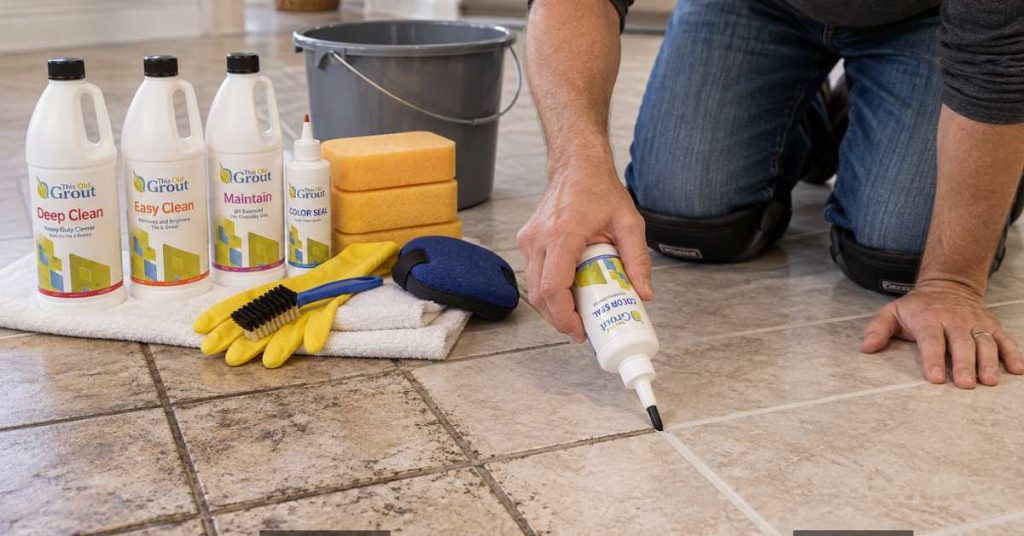
Deep Clean + Easy Clean + Color Seal: A 3-Step Grout Restoration System
Sep
Dirty grout can make an otherwise good tile floor look old.
That does not always mean the grout needs to come out.
If the grout is still solid but has become stained, greasy, discolored, or uneven, restoration may be a much easier option than removing and replacing it.
At This Old Grout, the process can be broken into three basic steps:
Deep Clean. Easy Clean. Color Seal.
Each product has a different job.
Deep Clean removes heavy buildup, grease, old sealers, and other contaminants. Easy Clean provides the final cleaning and preparation needed before color sealing. Then Color Seal restores the grout to a clean, uniform color and helps protect it from future staining.
Here is how the complete 3-step grout restoration system works.
Why Cleaning Alone Does Not Always Restore Grout
Many homeowners start by scrubbing.
Sometimes that works.
If the grout only has light surface dirt, a thorough cleaning may make a big difference.
However, grout is porous. Over the years, it can absorb oils, spills, cleaning residue, soap, and other contaminants.
It can also develop permanent color changes.
That is why old grout sometimes still looks blotchy after a good cleaning.
The grout may actually be clean, but the original color no longer looks consistent.
That is where restoration becomes different from cleaning.
Instead of repeatedly scrubbing the same grout, you clean it properly, prepare the surface, and restore the color.
Step 1: Start With Deep Clean
The first step is getting rid of what should not be on the grout.
This Old Grout Deep Clean is designed for heavier cleaning and stripping jobs.
It is especially useful when grout has:
- Greasy or oily buildup
- Heavy soil
- Old grout sealer
- Wax
- Previous coatings
- Embedded dirt
- Years of cleaning residue
Kitchens are a good example.
Cooking oils can slowly work their way into grout joints. Regular mopping may make the tile look clean, but oily residue can remain in the grout.
High-traffic areas can have similar problems.
Before Color Seal can bond correctly, those contaminants need to come out.
Previously Sealed Grout Needs Extra Attention
If the grout has already been sealed, Deep Clean becomes especially important.
A previous sealer can prevent a new coating from bonding correctly.
The problem is that you may not always know what someone applied years ago.
If you recently bought the home, the grout may have been treated several times by previous owners.
Look for areas where liquids bead on the grout or where the surface feels coated.
When old sealers or coatings are present, remove them as part of the preparation process instead of applying Color Seal over them.
Let the Cleaner Do Some of the Work
Cleaning grout is not only about scrubbing harder.
The cleaner needs time to work.
Follow the product directions for dilution and dwell time. Work in manageable sections so the cleaner does not dry on the surface.
Then agitate the grout with an appropriate brush or cleaning tool.
Afterward, remove the dirty solution and rinse thoroughly.
The goal is not simply to make the grout look lighter.
You are trying to expose a clean surface that can move on to the next step.
Step 2: Prepare the Grout With Easy Clean
Once heavy grease, old sealer, and other contaminants are removed, the next step is Easy Clean.
This is where the process is sometimes misunderstood.
Easy Clean is not simply another version of Deep Clean.
It has a different purpose in the restoration system.
Easy Clean helps remove remaining discoloration and surface buildup while preparing the grout for Color Seal bonding.
Think of Deep Clean as the heavy cleaning and stripping step.
Easy Clean is the final preparation step.
Both matter when you are trying to create a surface that will accept Color Seal properly.
Why Preparation Matters Before Color Sealing
Color Seal needs to bond directly to properly prepared grout.
If dirt, grease, cleaner residue, or another coating sits between the grout and Color Seal, the finished result may not perform as intended.
That is why preparation matters so much.
It is similar to painting.
You would not paint over greasy walls, loose paint, or wax and expect a professional result.
Grout restoration works the same way.
Spend the time preparing the surface before applying the finish.
It is much easier than trying to correct a bonding problem later.
Rinse the Grout Thoroughly
Cleaning products should not remain on the grout before Color Seal goes down.
After using Easy Clean, rinse thoroughly according to the product directions.
Remove the dirty cleaning solution instead of simply spreading it around the floor.
Then allow the grout to dry completely before applying Color Seal.
Dry grout gives you a much better surface to work with.
Do not rush directly from wet cleaning into color sealing.
Be Careful With Natural Stone
Not every tile surface reacts the same way to cleaning chemicals.
Easy Clean is an acid-based cleaner, so homeowners should use extra care around acid-sensitive natural stone.
Marble, limestone, travertine, and some other stone surfaces may react to acidic products.
Always confirm that the cleaner is appropriate for the surface you are working on.
When in doubt, test a small hidden area first or use a product designed for that specific type of stone.
The goal is to restore the grout without damaging the surrounding tile.
Step 3: Restore the Grout With Color Seal
Once the grout is clean, properly prepared, and completely dry, you can move to Color Seal.
This is where the visual transformation happens.
Color Seal can restore old grout to a consistent color.
It can also change the grout to a completely different color.
For example, you may decide that the original beige grout no longer works with your tile.
You could move to gray, white, charcoal, or another shade that fits the room better.
You are not limited to making the grout look exactly the way it did when it was new.
Color Seal Is More Than a Grout Stain
People often search for products using terms such as grout stain, grout paint, grout dye, and grout colorant.
Color Seal goes beyond simply adding color.
It creates a uniform appearance while also protecting the grout against staining.
That makes it useful for grout that is structurally sound but no longer looks good.
Instead of tearing out the tile or removing all the grout, you restore the surface that is already there.
For many homeowners, that can completely change the look of a room.
You Can Go From Light to Dark—or Dark to Light
One advantage of Color Seal is the ability to make a real color change.
You can move from lighter grout to darker grout.
You can also go from darker grout to a lighter shade.
That gives homeowners much more control over the finished appearance.
A grout color close to the tile creates a softer, more blended look.
A contrasting color makes the individual tiles stand out.
There is no single right answer.
Choose the color based on the tile, room, lighting, and look you want.
Apply Color Seal Carefully
Color Seal should go directly onto the prepared grout joint.
Work in smaller sections so you can control the application.
The product gets worked into the grout joint with an appropriate applicator, such as a small brush.
Then remove excess material from the tile according to the instructions.
Take your time.
A neat application makes cleanup easier and helps create a more consistent finished grout line.
You do not need to rush through the room.
What If the Grout Is Cracked or Missing?
Color Seal restores color and adds protection.
It does not replace damaged grout.
Before beginning the restoration process, inspect the joints.
Look for:
- Missing grout
- Loose grout
- Crumbling areas
- Large cracks
- Failed repairs
Those areas should be repaired first.
Once the grout is sound and any repairs have properly cured, you can continue with cleaning, preparation, and Color Seal.
How Much Can Grout Restoration Change a Floor?
Quite a lot.
Grout lines cover a relatively small percentage of most tile floors, but they have a major effect on the overall appearance.
Dark, stained, uneven grout can make clean tile look dirty.
Once those lines become clean and uniform, the entire floor can look newer.
This is especially noticeable in kitchens, bathrooms, entryways, laundry rooms, and other heavily used areas.
Before deciding that old tile needs to be replaced, look closely at the grout.
The tile may not be the problem.
What Happens After Color Sealing?
Once the grout has been restored, the goal changes from restoration to maintenance.
You do not want to repeatedly use heavy restoration cleaners unless the situation calls for them.
For normal routine cleaning, use a cleaner designed for regular maintenance and compatible with the finished surface.
This Old Grout’s Maintain cleaner is designed as a neutral-pH maintenance cleaner for ongoing cleaning.
That helps separate the jobs clearly:
Deep Clean tackles heavy buildup and old sealers.
Easy Clean helps with final preparation.
Color Seal restores and protects the grout.
Then routine cleaning helps maintain the finished surface.
A Simple System for Old, Tired Grout
Grout restoration does not need to be complicated.
The key is understanding that cleaning, preparation, and color restoration are three different jobs.
Step 1: Deep Clean
Remove grease, oil, old sealers, waxes, coatings, and heavy buildup.
Step 2: Easy Clean
Complete the cleaning process and prepare the grout so Color Seal can bond properly.
Step 3: Color Seal
Restore or change the grout to a uniform color while adding stain protection.
That sequence gives homeowners a clear way to approach grout that looks old but is still in good physical condition.
Restore Instead of Replace
Tile replacement can be expensive and disruptive.
Regrouting can also be time-consuming when the existing grout is still structurally sound.
Sometimes the better answer is restoration.
For more than three decades, This Old Grout has focused on contractor-grade tile and grout restoration products that homeowners can use to achieve professional-quality results themselves.
The Deep Clean + Easy Clean + Color Seal system addresses the job in the right order.
First, remove the contaminants.
Next, prepare the grout.
Then restore and protect the color.
If your tile still looks good but the grout makes the entire room look old, do not assume you need a new floor.
A proper grout restoration may be all it takes to bring it back to life.
