

Grout Solutions
How to Prepare Tile Floors for Grout Color Sealing
Sep
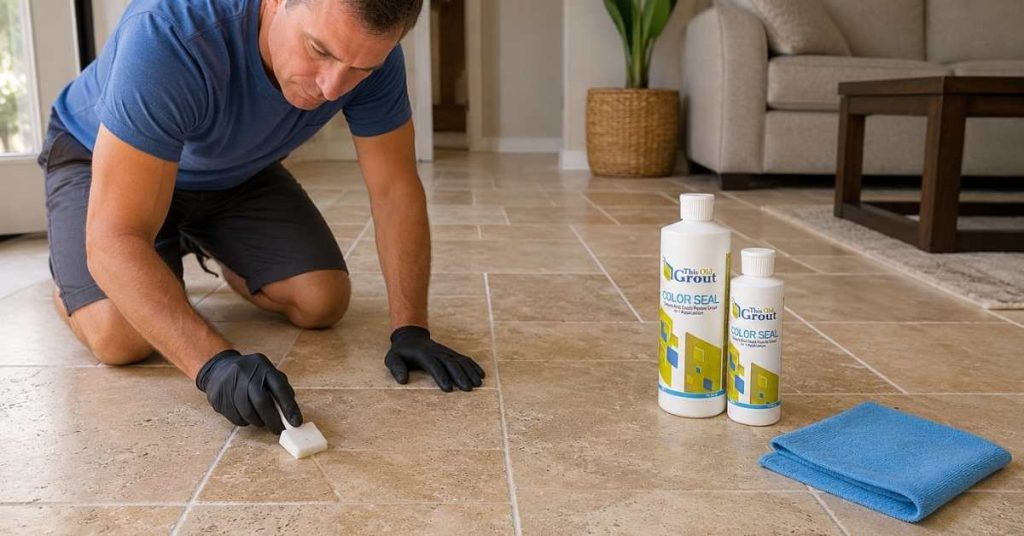
Using grout color sealing to transform an older tile floor is something amazing. Grout stain can help you restore stained or uneven grout into a uniformly-colored look. You can change the color of your floor or simply make it cleaner by restoring it.
However, good results won’t happen with a single Color Seal bottle.
To get good results, you need good preparation.
Dirt, soap, greasy spots, residues of old sealant and other substances may interfere with the connection between grout and Color Seal. So, proper preparation of tile floors is extremely important to achieve the desired results.
At This Old Grout, we have spent many years developing grout restoration products that can be used by contractors and homeowners to restore the grout and give their tile floors a fresh look. However, like any other restoration process, it starts with the right grout preparation.
Here is how you should prepare your tile floor.
Importance of Proper Grout Preparation Before Color Sealing
Grout is porous. As time goes by, the grout gets dirt, oils, food spots, soap residues and other impurities.
While you can easily remove most of it using regular mopping, some substances are trapped inside the pores of grout and cannot be removed using simple mopping.
Old sealer used for grouting can also become an obstacle preventing proper bonding of grout and new Color Seal product.
So, applying grout stain on a dirty floor may lead to bad results.
You don’t want to waste your time restoring the grout just to realize that some parts won’t stick to the floor properly.
Take grout preparation seriously. It is an important stage of the process.
Step 1: Sweep the Floor
You should start with the simplest stage of preparation of your tile floors – sweeping the floor.
Remove dirt, crumbs, hair, sand and other loose impurities from the tile floor using a broom. Pay extra attention to the grout joints.
It seems pretty obvious but cleaning the floor after sweeping makes it much easier to get good results.
Also, move any obstacles (furniture, etc.) that prevent you from cleaning the entire floor.
Step 2: Inspect the Grout Before Cleaning
Inspect the grout joints and check the condition of grout before you start to clean them.
Grout color sealing can restore the grout and change its color if it remains in good condition. Check for cracked joints, loose or missing parts of grout and any damages.
You should also inspect the grout for the following signs:
- Greasy spots
- Heavy dirt
- Soap residues
- Old coatings or previous sealer
- Uneven grout repairs
- Wax or other floor-care residue
- Stains that regular cleaning couldn’t remove
Do not worry if the grout is still uneven after regular cleaning. In this case, grout color sealing will fix this issue.
However, if you have too loose or badly damaged grout joints, you should repair them before changing its color.
Step 3: Remove Grease, Dirt and Old Grout Sealer
In this step, you should clean the grout thoroughly.
If there is grease or grout sealer on your floor, it is recommended by This Old Grout to use Deep Clean product to remove them before the application of Color Seal.
Of course, kitchen floors should be cleaned particularly carefully since cooking oil can settle down into the grout over time.
Entryway floors usually contain soil and residues of cleaning products. In bathrooms, you can find soap, skin oils, cosmetics residues and other contaminations.
So, you should scrub your grout joints and do not just mop them to remove the dirt.
The main goal here is to expose the clean grout so that you can prepare it for Color Seal in the next step.
Step 4: Prepare Grout for Color Seal Bonding
Cleaning of the surface is only the first part of the process.
Preparation system of This Old Grout includes a special product for cleaning and preparation of the grout so that Color Seal can stick to it. Current instructions of the company recommend to use Easy Clean for this step.
Do the work in manageable sections.
Apply the cleaning product and agitate the grout in accordance with the manufacturer’s instructions.
However, do not let dirty water just dry on your floor.
You should not simply move the contaminants.
Step 5: Rinse the Tile and Grout Thoroughly
The rinsing step is one of the easiest stages in the process of grout restoration. It often takes little time to perform.
Do not hurry with this stage!
Any residue of cleaners can interfere with the restoration process in the same way as dirt can.
Use fresh water to wash your floor. Depending on the dirtiness of the floor, you can perform several rinses.
Pay extra attention to the grout joints.
If the water still contains dirt, you should continue cleaning and rinsing until the floor becomes clean.
Then, remove as much water from the floor as you can.
Step 6: Let the Grout Dry Completely
Color sealing wet grout is a bad idea.
After you have cleaned and rinsed the floor, you should give it enough time to dry thoroughly. Grout may seem dry on the surface but still contain moisture.
Do not hurry with this stage since you are eager to finish your work.
The instructions for Color Seal of This Old Grout explicitly state that you should start with clean and dry grout.
Good preparation often includes less action and not more.
Once the grout became clean, you should only provide it with required conditions.
Step 7: Test a Small Area First
Before sealing your floor with Color Seal, you should first try to use it on a small area.
You can choose any grout joint in the less noticeable place.
This will give you a chance to check the color of the grout and the look of the product on your tiles.
Do not forget that grout color affects the overall look of the whole tile installation.
Darker grout creates more contrasts between tiles. Lighter grout color makes your floor lighter. Moreover, if you choose the color similar to the tile color, you can create a more blended look of the floor.
This Old Grout Color Seal allows you to either restore the grout into its initial color or to change it to another grout color.
Preparation of New Grout for Color Sealing
Grout color sealing is not only for old or stained grout.
You can protect your new grout from staining using Color Seal.
However, in this case, your grout needs to have some time after installation before you can use Color Seal. According to the instructions of This Old Grout, you should wait 10 days after new grout installation.
It makes Color Seal very useful for both old and new tile floors.
Instead of waiting until light-colored grout becomes stained and uneven, you can add protection to the new grout.
What Not to Do Before Grout Color Sealing
Several steps that may seem helpful can cause you problems with grout restoration.
You should not apply grout stain over the dirty grout since you hope it will cover everything.
You should not skip the step of cleaning the old sealer when it is present.
You should not leave the residue of the cleaning solution on the floor.
Moreover, you should not apply Color Seal when the grout is still wet.
Finally, you should not use strong cleaning product thinking it will be more effective.
Proper preparation is not an attack on the grout with the most powerful chemical.
Proper Grout Preparation Simplifies Grout Restoration
Color sealing can transform an old tile floor dramatically without removing it.
But good results depend greatly on the preparation of the floor before Color Seal application.
First, you should remove loose dirt. Then, inspect the grout. Deep clean greasy areas and remove old sealer when it is necessary. Prepare the grout correctly, rinse the floor and let everything dry.
Now, you are ready for the most interesting part of your work – restoration of grout color.
This Old Grout provides you with contractor-quality products for cleaning, grout restoration, grout stain and color sealing of your tile floors.
Do not skip the preparation of the grout when you plan to restore it at home.
