

Grout Solutions
Can You Use Grout Stain on New Installation? Expert Answers
Nov
Why New Installations Tempt You to Stain Immediately
When you finish installing new tile, everything looks crisp and clean. However, many homeowners contemplate whether they can enhance the grout color right away with a grout stain. After all, new tile work seems like the perfect moment — no old wear, no previous residue, no color mismatch to deal with. In theory, starting at “zero” allows you to select your ideal grout shade and lock it in.
Staining soon after installation can help hide small imperfections or lighten grout that turned out darker than expected. For bathrooms, kitchens, and high‑traffic areas, a freshly stained grout line can provide a uniform look across the tile, add contrast or coordination with your decor, and offer an immediate upgrade.
Still, applying grout stain on newly installed tile requires care, correct timing, and the right materials. Without proper technique, you may end up with uneven color, stain bleeding onto tile surfaces, or incomplete penetration — especially on porous grout.
Below, we outline when to stain, how to prep, and why waiting might be the smarter choice.
When You Should Wait Before Grout Staining
-
Curing and drying time: Fresh grout usually needs time to cure properly. Applying stain too early can trap moisture beneath the surface, causing discoloration or poor adhesion.
-
Settling and shrinkage: Grout may shrink or shift slightly during the first few days post-installation. Staining too soon might result in color gaps or uneven absorption.
-
Initial sealers and coatings: Some tile or grout installers apply sealers or additives that interfere with stain bonding. If the grout was pre‑sealed or treated, staining might fail or appear blotchy.
Preparing New Grout for Stain: Must-Do Steps
-
Wait a minimum of 48–72 hours after grout application for standard Portland-cement grout, longer if conditions (humidity, ventilation) slow curing.
-
Clean grout lines thoroughly. Remove excess grout residue and allow grout to air‑dry completely. Use water and mild cleaner, then rinse and dry.
-
Avoid using waxy or silicone-based sealers before staining. If sealers were applied, you might need a light sanding or chemical prep to remove surface film so the stain can penetrate.
-
Test a small, inconspicuous area first — especially if your tile is porous or textured — to ensure stain does not bleed onto the tile surface.
Types of Grout That Accept Stain Well vs. Those That Don’t
| Grout Type | Stain Compatibility | Notes |
|---|---|---|
| Standard cement-based grout (sanded or unsanded) | ✅ Good, after full cure and proper cleaning | Absorbs dye stains well, ideal for deeper colors. |
| Epoxy grout | ⚠️ Poor to moderate | Epoxy is non‑porous; stain may sit on surface but not absorb — often looks blotchy. |
| Pre-sealed or urethane-modified grout | ⚠️ Risky unless sealer removed or lightly abraded | Surface film blocks stain absorption. |
| Grout with high additive content (e.g. polymers) | Mixed results | Test first — additives may block dye penetration. |
For best results, stick to traditional cement-based grout when you plan to stain early.
Long Section (300+ Words) — What Happens If You Stain at the Wrong Time
Staining new grout too early or before proper preparation often leads to problems over time. Moisture trapped beneath stain may cause the color to darken unevenly as the grout dries, leading to blotches or patches. Over time, such moisture can degrade the grout integrity. In wet areas like bathrooms or kitchens, that trapped moisture can encourage mildew growth, defeating one of the main benefits of using grout stain or sealer. Also, grout that wasn’t given time to “settle” can shrink or crack after stain application, which results in thin, uneven color coverage and potential failure of the stain to bond. If stain bleeds onto tile surface — often an issue on porous or textured tiles — cleaning becomes difficult. You might need to re-scrub, re‑grout, or even replace sections to restore uniformity, adding unnecessary cost and time. Moreover, warranty coverage from tile and grout installers may void if you intervene too soon with staining or sealing before their recommended curing time. That means any subsequent tile shifts, grout shrinkage, or water damage may not be covered. For homeowners who value long-term durability and cleanliness, these risks outweigh the short-term appeal of immediate staining.
Given these concerns, many professionals — including our team at This Old Grout — recommend waiting at least 7 to 14 days after installation before applying any stain or sealer. This allows the grout mortar to fully dry, cure, and settle under normal environmental conditions.
During that period, you should keep the area dry, avoid heavy traffic, and refrain from using acidic cleaners or harsh chemicals. Once cured, you clean the grout thoroughly, then proceed with stain or sealer application using a dye‑based or epoxy stain followed by a top‑grade grout sealer. When done correctly, you end up with uniform color that penetrates deep into the grout lines, resists moisture, and reduces future maintenance.
By following this process, you ensure the stain bonds properly — not just superficially — and you preserve the structural integrity of the grout over years of use.
Best Practices: How to Use Grout Stain on New Installations
-
Wait at least 1–2 weeks after grouting before staining.
-
Clean thoroughly — remove all drywall dust, grout haze, and residue.
-
Ensure grout is bone‑dry — perform a moisture test if uncertain.
-
Tape off tile edges to prevent stain from touching tile surfaces.
-
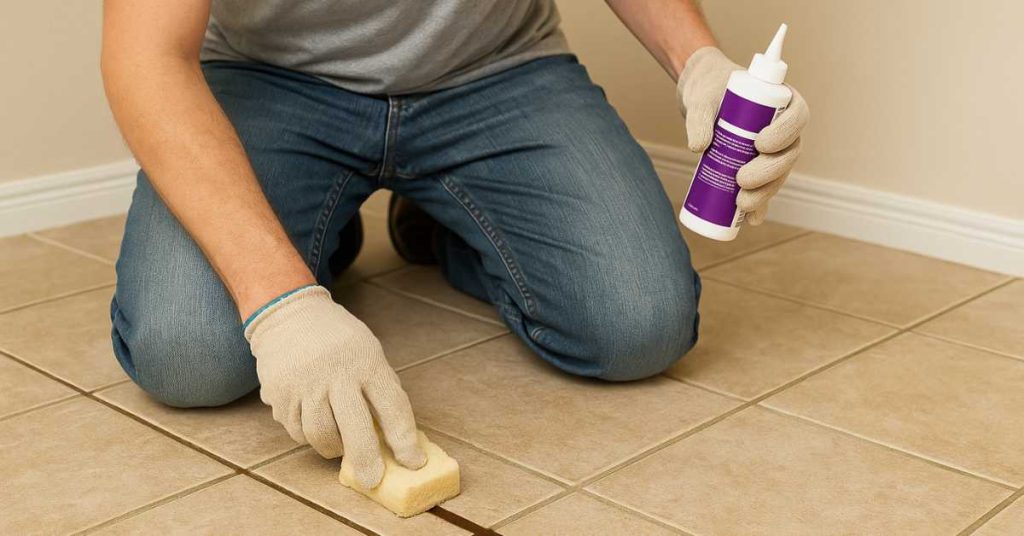
Use a dedicated grout stain applicator or sponge — avoid regular brushes.
-
Wipe away excess stain from tile surface immediately to prevent permanent staining.
-
Once stain dries, apply a high-quality grout sealer to protect against moisture, staining, and wear.
Why This Old Grout Makes It Easy and Reliable
With over 30 years in the tile and grout restoration industry, This Old Grout offers contractor‑grade grout stains, sealers, and cleaners that deliver lasting results. Our products penetrate deep into mortar lines for rich, even color and long-term durability. We also supply specialized tile-and-grout cleaners that remove installation residue and prepare grout for stain or sealer. Plus, our kits include easy-to-follow instructions so even homeowners can get professional-grade results without dealing with mismatched colors or streaky finishes.
Our reputation stems from quality, consistency, and trust. Whether you install tile in a bathroom, kitchen, or living area — or even new flooring — you’ll get tools and products that make your work look like it was done by an experienced pro.
Final Takeaway
Yes — you can use grout stain on a new installation, but only when you time it correctly and prepare the grout properly. Rushing the process introduces risks like uneven color, moisture entrapment, grout failure, or warranty issues. When you wait, clean thoroughly, and use top-quality stain and sealer systems like those from This Old Grout, you set yourself up for durable, beautiful grout lines that last for years.
If you just finished a tile install — or plan one soon — give yourself time. Let the grout cure, then stain with care. The result? A professional-quality finish that enhances your tile and elevates your whole room.
