

Grout Solutions
How Do Professionals Clean Tile and Grout?
May
A floor can look freshly mopped and still feel tired if the grout lines are dark, blotchy, or packed with residue. That is usually the moment homeowners start asking, how do professionals clean tile and grout when regular scrubbing barely moves the needle? The short answer is that pros do not rely on one miracle spray. They use the right chemistry, the right agitation, and the right follow-up protection so the surface does not slip back to dingy a week later.
How do professionals clean tile and grout without damaging it?
Professional cleaning starts with diagnosis, not scrubbing. Tile and grout do not all hold soil the same way, and the cleaner that works on a porcelain kitchen floor can be the wrong choice for a natural stone shower. Pros first identify the surface, the type of buildup, and whether the discoloration is removable soil or permanent staining.
That distinction matters. Grease, soap scum, hard water minerals, and tracked-in dirt can usually be cleaned away. Deep-set grout staining, color loss, and uneven blotchiness often need restoration, not just cleaning. A good pro knows the difference before wasting time with harsher and harsher products.
In most homes, the process follows a simple sequence. First comes dry soil removal. Then a targeted cleaner is applied and given time to work. After that, the surface is agitated with the proper brush or pad, rinsed thoroughly, and dried. If the grout is still discolored, professionals move to sealing or color sealing instead of pretending more scrubbing will solve a wear problem.
The professional process, step by step
1. Remove loose soil before adding water
This sounds basic, but it is where a lot of DIY cleaning goes sideways. Grit, hair, dust, and sand turn into muddy residue once the floor gets wet. Professionals vacuum or dry sweep first so the cleaner can reach the actual buildup on the tile and inside the grout pores.
On textured tile, this step is even more important because debris hides in the low spots. On shower walls, pros may dry wipe loose dust and surface residue before applying any product.
2. Match the cleaner to the soil
This is one of the biggest differences between professional work and random household cleaning. Pros choose products based on what they are removing.
For greasy kitchen buildup and embedded dirt, they typically use an alkaline cleaner or a professional deep cleaner designed to break down oils and organic soil. For soap scum and hard water, especially in showers, an acid-based or mineral-targeting cleaner may be appropriate on acid-safe surfaces. For mold or mildew staining, they may use a dedicated treatment, but only after confirming the discoloration is biological growth and not mineral residue.
The trade-off is simple. Stronger chemistry can work faster, but not every surface can handle it. Natural stone such as marble, travertine, and limestone requires a much more careful approach. Acid on those materials can etch the finish and create a bigger restoration problem than the original stain.
3. Let the cleaner dwell
Professionals do not spray and immediately wipe. They allow the cleaner to dwell for several minutes so it can loosen buildup. This is where results start to change. Dwell time gives the product a chance to break the bond between the grime and the surface.
The key is keeping the cleaner active without letting it dry out. On walls or in hot rooms, pros may work in smaller sections for that reason.
4. Agitate with the right tools
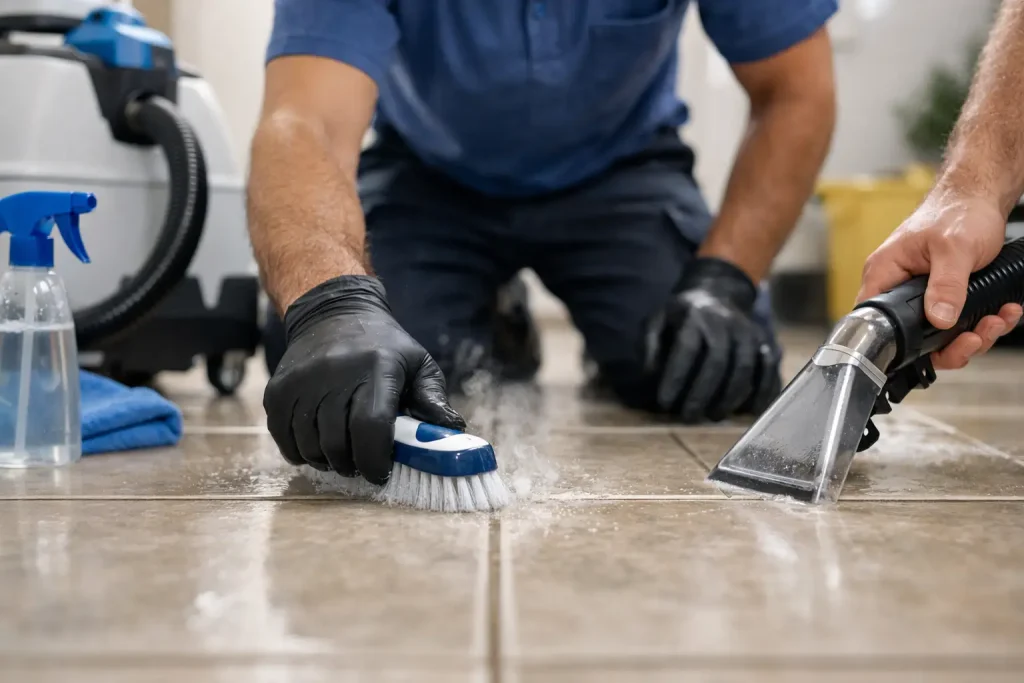
The phrase scrubbing hard is not the professional method. Agitation matters, but the right brush matters more. Pros use grout brushes, deck brushes, white pads, or machine-driven scrubbers depending on the area and surface texture.
For grout lines, a stiff nylon brush is common because it can reach into the joints without shredding them. For tile surfaces, especially larger floor areas, a machine scrubber often delivers more even cleaning with less effort. In showers and tight corners, hand tools still do the best work.
Wire brushes are generally avoided because they can damage grout and leave metal marks. Abrasive pads can also dull certain finishes. Professional cleaning is controlled, not aggressive for the sake of looking busy.
5. Rinse and extract completely
One reason some tile floors look worse after cleaning is leftover detergent. Residue attracts more soil, which means the floor dulls fast. Professionals rinse thoroughly and, when possible, extract the dirty solution instead of just pushing it around.
On floors, that may mean wet vacs or extraction equipment. In showers, it means repeated rinsing and careful wipe-down. Clean tile is not just stain-free. It should also feel residue-free.
6. Dry and inspect under normal light
After the surface dries, professionals inspect for remaining stains, haze, damaged grout, or inconsistent color. Wet grout can look cleaner than it really is, so inspection after drying is part of the process.
This is often the point where a pro decides whether the grout needs sealing, repair, or color sealing. Cleaning removes contamination. It does not fix erosion, permanent staining, or years of color loss.
Why grout is harder to clean than tile
Tile is usually the easy part. Most tile surfaces are denser and less absorbent than grout, so soil sits on top instead of soaking in. Grout is more porous, especially if it was never sealed or the sealer has worn off. That porosity is why grout grabs mop water, spills, body oils, soap residue, and dirt from foot traffic.
It is also why old grout can look uneven even after a serious cleaning. Some areas may be truly clean but still discolored because the original pigment has worn away or stains have penetrated beyond the reach of surface cleaners. This is where homeowners often spend too much time chasing a cleaning fix for what is really a restoration issue.
When pros stop cleaning and start restoring
A seasoned restoration specialist knows when to stop promising that one more round of deep cleaning will do it. If grout is permanently stained, blotchy, or impossible to keep looking uniform, the better move is often color sealing.
Color sealing does two jobs at once. It restores a clean, even grout color and adds stain protection so future maintenance becomes much easier. For many homeowners, this is the real professional secret. The best-looking grout is not always the grout that was scrubbed the hardest. It is often the grout that was cleaned correctly, then sealed or recolored to create a uniform finish and long-term protection.
That is why restoration-first systems have become so popular. Instead of replacing grout or living with dark lines that make the whole room look older, you can clean away the buildup, apply a color sealer, and get a stain-free makeover that looks professionally finished.
Tools professionals rely on most
Pros do use better products, but tools matter too. A strong vacuum, grout brush, microfiber towels, scrub pads, and extraction equipment all help create a cleaner result with less residue left behind. In larger spaces, low-moisture floor machines and rotary scrubbers save time and produce more consistent agitation than hand scrubbing.
Still, more equipment does not always mean better. In a small bathroom, good chemistry and a proper brush can outperform an oversized machine. The right setup depends on the space, the surface, and the type of buildup.
Common mistakes that make tile and grout look worse
The biggest mistake is using the wrong cleaner over and over. A neutral daily cleaner will not cut through years of grease, and a harsh acidic product can damage the wrong surface. Another common issue is flooding the floor with dirty mop water, which drives more soil into porous grout.
Over-scrubbing is another problem. If the grout is weakened, aggressive cleaning can rough up the surface and make it collect dirt faster. Skipping protection after deep cleaning is also a missed opportunity. Once the grout is clean, sealing it helps preserve the work.
How professionals keep grout cleaner longer
Once tile and grout are restored, maintenance becomes simpler. Professionals usually recommend a pH-appropriate maintenance cleaner, prompt cleanup of spills, and avoiding heavy soap or waxy products that leave film behind. In showers, reducing standing moisture and rinsing residue from walls makes a real difference.
For high-traffic floors, periodic deep cleaning paired with sealer maintenance is what keeps grout from heading back to square one. If the grout color is already uneven, a professional-grade color sealer can be the smarter long-term fix. This Old Grout has built a strong following around that exact approach because it restores appearance and stainproofs grout in one step, which makes ongoing care a piece of cake compared with constant heavy scrubbing.
So how do professionals clean tile and grout? They clean with purpose, not guesswork. They identify the problem, use the right chemistry, remove residue completely, and protect the grout so the results last. If your tile still looks tired after basic cleaning, that does not always mean you need replacement. Sometimes the best next step is simply to restore it right back to new.
